Startup Guide Steps

Prepare
Install the RICOH360 app
Install the RICOH360 app for smartphones


Sign up for a RICOH360 account
To use RICOH360, you first need to sign up for a RICOH360 account.
* Accounts created with RICOH 360 can also be used with RICOH360 Tours.
Also, accounts created with RICOH 360 Tours can also be used with RICOH360, so if you have already created an account with RICOH360 Tours, there is no need to create an account here.
* When using the service, please read and agree to the Terms of Use and Privacy Policy. If you do not agree, you cannot use this service. Please understand in advance.
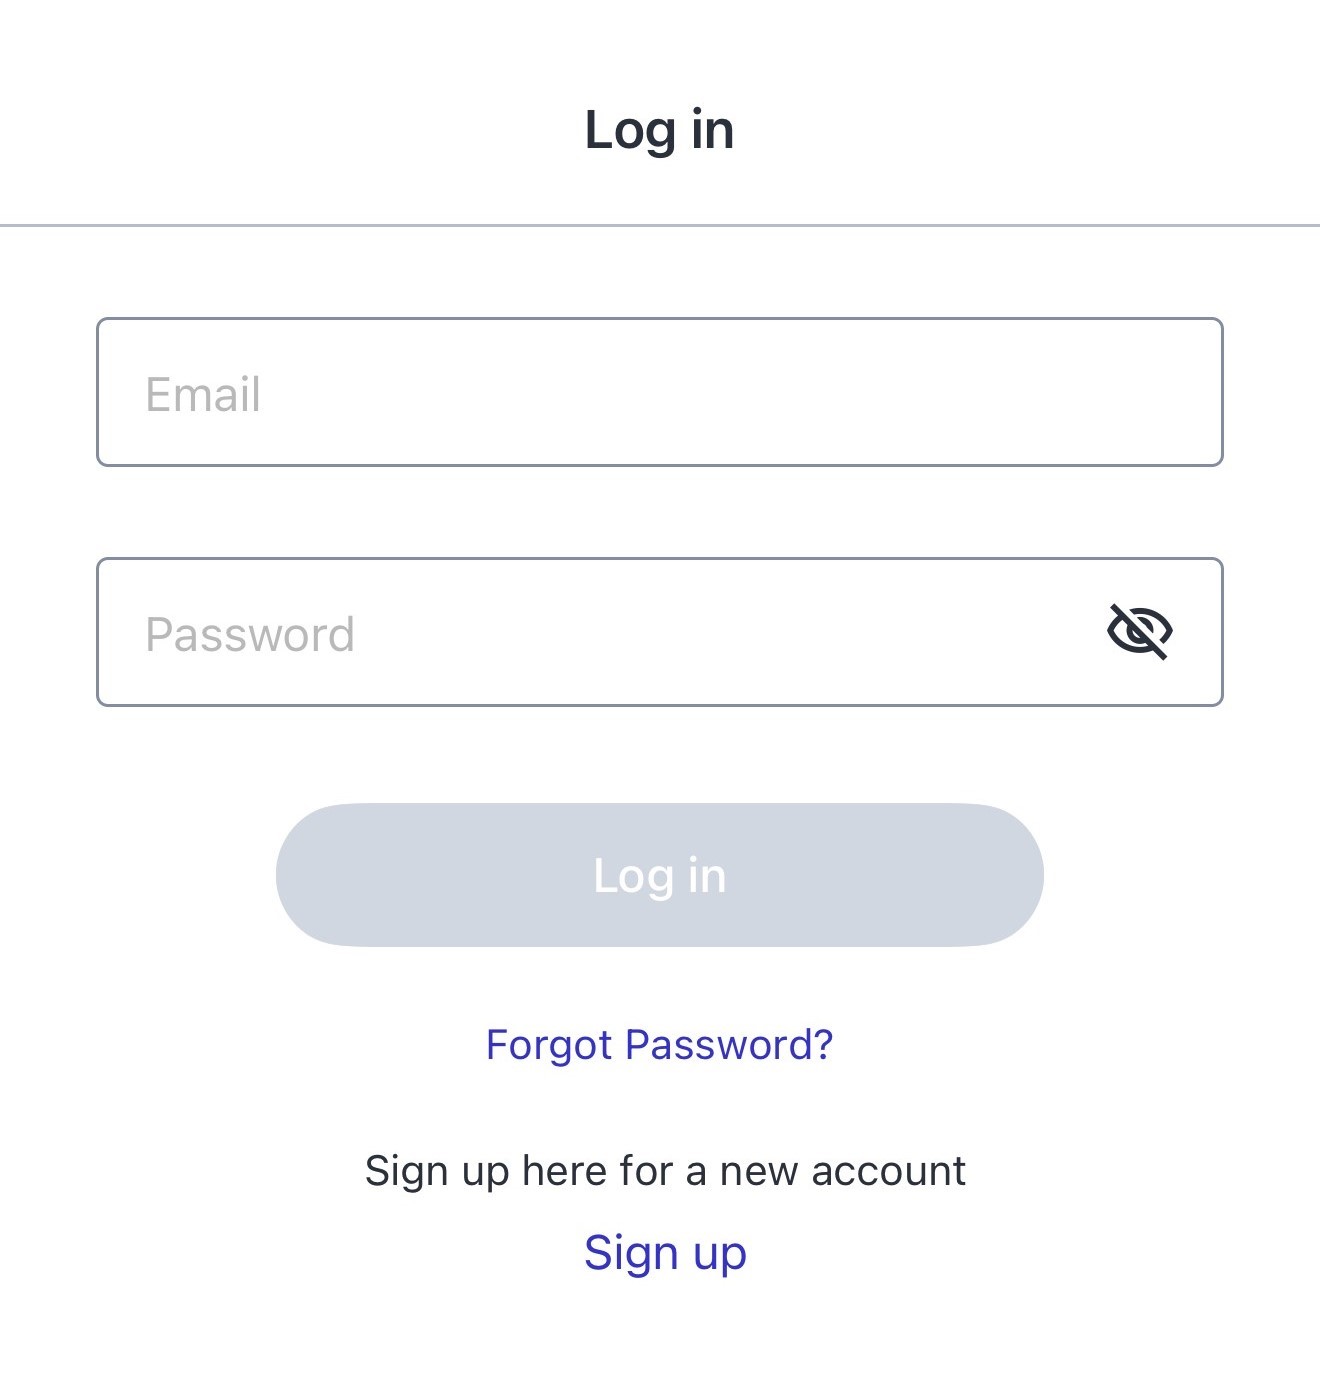
Signing up for an account on a PC
- Open the account creation page in your browser
- Enter your Email address and Password
- Read the Terms of Use and Privacy Policy, and check the box
- Click the Create Account button
Signing up for an account on a smartphone
- Go to the RICOH360 App Download page, install the app, and Create a new account
Checking the Package
When opening the package, check that the following items are included:
RICOH THETA V

USB cable

Soft case

Quick Start Guide
Important Message to Customers
Names of Camera Parts
This section explains the names and functions of the buttons, lamps, etc. on the camera.

1. Microphone
Four microphones are incorporated in the camera.
2. Lens
Caution
Be careful when handling the lens section to avoid damage.
3. Camera status lamp
Indicates the camera status.
Lit in blue
The camera can be used.
Flashing in blue
The camera is starting up (when the lamp flashes slowly).File conversion is progressing (when the lamp flashes rapidly).
Lit in white
The plug-in installed in the camera is running.
Flashing in red
An error has occurred in the camera.
Lit in green
The self-timer can be used for shooting.
Unlit
Shooting is not possible as the camera is in the sleep mode, no more images can be captured, or no more recordable time remains. The lamp is also unlit during shooting.
4. Shutter button
Press to capture images.
5. Speaker
6. Wireless lamp
Indicates the wireless LAN connection status.
Lit
The wireless LAN function is on. (The camera is connected to a wireless LAN.)
Flashing
The wireless LAN function is on. (The camera is not connected to a wireless LAN.)
Unlit
The wireless LAN function is off.
7. Capture mode lamp
The lamp that corresponds to the selected capture mode lights.Shooting is not possible while the lamp is flashing because internal processing is in progress.
and
flash during the firmware update.
8. Video recording lamp
Flashes while capturing video.
9. Memory warning lamp
Indicates the remaining number of images that can be captured.
Unlit
Remaining number of images that can be captured: 1300 or more (Remaining memory: 5 GB or more)
Lit
Remaining number of images that can be captured: 500 or more but less than 1300 (Remaining memory: 2 GB or more but less than 5 GB)
Flashing
Remaining number of images that can be captured: Less than 500 (Remaining memory: Less than 2 GB)
10. Power lamp
Indicates the power status. (Details)
11. Power button
Turns the power on/off when the button is pressed and held.
Puts the camera to sleep when the button is pressed.
12. Wireless button
Turns the wireless LAN function on/off. (Details)
13. Mode button
Switches among the still image capture mode, video mode, and live streaming mode. (Switching to the live streaming mode is possible only when the USB cable is connected.)
Runs the plug-in installed in the camera when the button is pressed and held. (Details)
14. Microphone terminal
Connects the 3D microphone TA-1 (sold separately). (Details)
Caution
Do not connect any device other than the 3D microphone TA-1 to the microphone terminal.
15. USB terminal
Connects the provided USB cable to connect the camera to a computer. (Details)
Caution
It may take time for the battery to charge or the battery may not charge at all when a USB cable other than the provided USB cable is used.
16. Tripod mount hole
Caution
When using the tripod, take care not to overtighten the screw.
Charging
The built-in battery needs to be charged before use.
1. Connect the camera to the computer using the provided USB cable.

The power lamp lights green when charging starts. (The lamp flashes in green when the remaining battery level is low.)
The power lamp is unlit when charging is complete.
2. Remove the USB cable after charging is complete.
Caution
- If the power lamp flashes in red, remove the USB cable and stop charging.
- Use the provided USB cable for charging. It may take time for the battery to charge or the battery may not charge at all when a USB cable other than the provided USB cable is used.
- Connect the cable directly to a USB port on the computer. Do not connect the cable via a USB hub. It may not be possible to charge via some USB hubs.
- When charging, be sure to insert and remove the USB cable while the computer is turned on. If the computer is restarted while the USB cable is inserted, the computer may not recognize the camera.
Charging Time
The camera is charged in approx. 200 minutes (at 25°C (77°F)).
Note
- The time described above is a guide for full charging. The charging time differs according to the remaining battery level.
- If the remaining battery level is low, it may take time for the camera to be recognized by the computer.
Turning the Power On/Off
When charging of the built-in battery is complete, turn on the power.
1. Press and hold the power button.

The lamp of the selected capture mode lights.
Press the power button to put the camera to sleep. Press and hold the power button again to turn off the power.
Power Lamp
The lamp indicates the camera status when the power is on.
Lit in blue
There is a sufficient battery level.
Flashing in blue
The battery level is low.
Flashing in red
The power is turning off.
Unlit
Charging is complete, the camera is sleeping, or the power is off.
Note
When the camera is connected via a USB cable, the lamp lights green and the battery is charged. The lamp is unlit when charging is complete.
Downloading the App
This camera captures great images. You can also use a smartphone app for shooting, viewing, and sharing images from your smartphone.
The following apps for smartphone are available for this camera.
Basic app
RICOH THETA (iOS app and Android app)
Editing app
RICOH THETA+ (iOS app and Android app)
1. Access the app download service that is compatible with your smartphone.
2. Search for “RICOH THETA”.
3. Follow the instructions on the screen to download the app.
An icon is displayed on the home screen when the download is complete.
Note
The apps for computer are also available. See below for details on each app and the latest information about apps.
https://support.ricoh360.com/app-download
Installing the App for Computer
There are some differences between functions provided by the “RICOH THETA for iPhone” (iOS app) and “RICOH THETA for Android” (Android app). The screens of “RICOH THETA for iPhone” (iOS app) are used as examples in this user guide.
Connecting to a Smartphone via Wireless LAN
When the camera is connected to a smartphone via a wireless LAN, you can use the smartphone to capture images remotely, view images, and make function settings.
1. Press the wireless button to turn the wireless LAN function on.
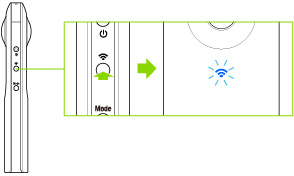
The wireless lamp flashes.
2. Display the Wi-FiTM settings of the smartphone.
3. Select the SSID of the camera from the network list and enter the password.
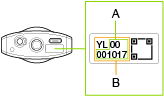
The serial number printed at the bottom of the camera is the same as the SSID and password.
The SSID is “THETA + Serial number indicated by (B) + .OSC” (in this case “THETAYL00001017.OSC”). The password is the numbers indicated by (A) (in this case “00001017”).
The password can be changed from the smartphone.
Checking and Changing the Camera Settings
The password is initialized by pressing and holding the wireless button while the power is on. The power turns off automatically at this time.
When the wireless LAN connection is complete, the wireless lamp lights.
Wireless Lamp
The wireless lamp indicates the wireless LAN connection status of the camera.
Lit
The wireless LAN function is on. (The camera is connected to a wireless LAN.)
Flashing
The wireless LAN function is on. (The camera is not connected to a wireless LAN.)
Unlit
The wireless LAN function is off.
Date and Time Settings
The date and time of the camera are synchronized with the smartphone when the camera is connected to the smartphone and the basic app is started.
Linking your smartphone and camera using the RICOH 360 app
By linking your smartphone and camera, you can operate your camera from your smartphone.
Turn on the power of THETA V
Tap the THETA List icon.

Tap New Camera.
Tap RICOH THETA V.

Check that the power of THETA V is turned on, and tap Next

Press the THETA V's wireless button

to turn on the wireless LAN (the wireless lamp will flash)
Tap Next

Enter the Serial No. and Password, then tap Connect.

When the dialog box appears, tap Join.

When “The camera and smartphone are now connected!” appears, the camera and smartphone have been linked!

To take a picture with the THETA that has been connected, tap Start Capturing .
Capture from the App - RICOH360
Automatic Upload is also possible using the Cloud.
Unregistering the Camera from the Smartphone
This operation cannot be performed while the smartphone is connected to THETA.
1. Start the RICOH360 app.
2. Tap [THETA List] at the bottom of the screen.
3. Select the camera you want to unregister from the camera list.
4. Tap the trash can icon in the upper right corner.

5. Tap [Delete].
