Startup Guide Steps

RICOH360 web
RICOH360 (Web browser) User Guide
Connect with other companies Apps
*This feature is available only to Admins of Teams subscribed to the RICOH360 Business Package.
You can integrate RICOH360 with third-party apps.
Connect is possible with apps displayed under [アプリ連携(App Connection)] in the Admin Console screen.
Steps to open the "アプリ連携(AppConnection)" screen
- Access app2.ricoh360.com/login in your PC browser and Log in.
- Click your username in the upper-right corner, then select Admin Console from the dropdown list
- (For users who are Admin for multiple teams) Click the Team Name displayed in the left menu and Select the Team Name from the dropdown list
- Click [アプリ連携(App Connection)] in the left menu
Refer to the following for App-specific Connect procedures.
Box
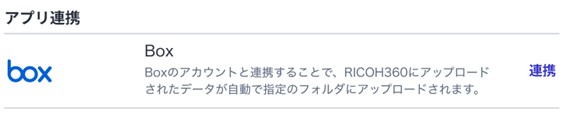
By linking RICOH360 with Box, data uploaded to the RICOH360 cloud will be automatically uploaded to the specified folder.
Files uploaded to Box via RICOH360 Connect automatically have ".360" appended before the file extension. This enables switching to 360-degree view mode (where swiping changes the viewpoint) on Box, similar to RICOH360. This enhances efficiency for managing and sharing Photos/Videos.
- To view the 360-degree viewer in Box, you must have a subscription to either Box "Business Plus," "Enterprise," or "Enterprise Plus."
- Box account administrators may set limits on the storage capacity allocated to each user. If the allocated storage capacity limit is exceeded during Uploading, an error will occur. We recommend checking the storage capacity allocated to the owner of the folder you intend to Connect beforehand. For setup instructions, please refer to the Box help page.
1. On the "アプリ連携(App Connection)" screen, tap [連携(Connect)] next to Box in the list displayed on the right.
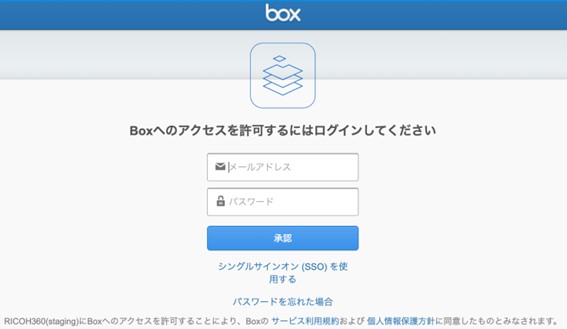
You will be redirected to the Box Log in screen.
2. Enter the Email and Password you registered with Box, then click [承認(Authorize)].
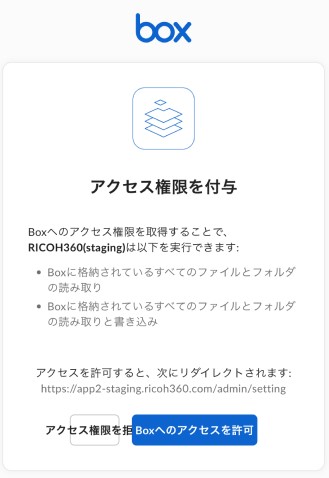
3. Click the [Boxへのアクセスを許可(Allow Access to Box)] button.
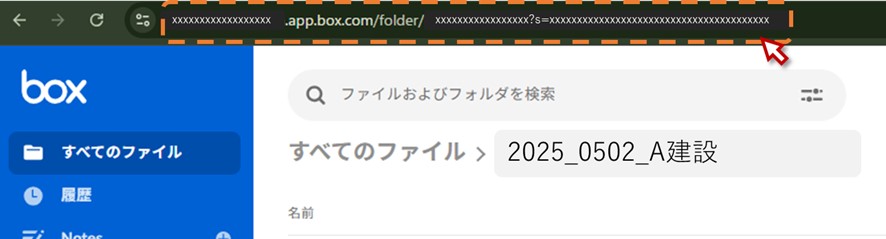
4. Enter the folder URL where you want to store image files.
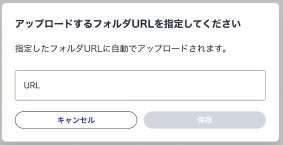
* To copy the Box folder URL, select the folder and copy the folder URL displayed in your web browser's address bar. Using the '共有リンクをコピー(Copy Link)' option shown on the folder list screen will cause anerror.
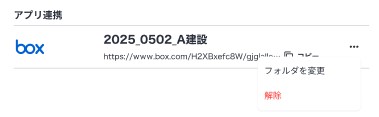
Once the connection is completed, the destination folder name and folder URL will appear in the Box section of the "アプリ連携(App Connection)" screen.
To change or remove the destination folder URL, hover your mouse cursor over the [...] on the right side of the Box field. Click either [フォルダ変更(Change Folder)] or [解除(Remove)].
* If the error is caused by exceeding the storage capacity limit assigned to the folder owner, the following Error message will appear:
- Error message on the RICOH360 App Connection screen: 'アップロードに失敗しています。連携先のフォルダがアップロード可能であることを確認し、再度連携する操作を行なってください。(Upload failed. Please verify that the destination folder is capable of receiving uploads and attempt the connection again.)'
- Message when attempting to upload a file on Box: "アカウントのストレージサイズの上限に達しました。(Your Account has reached its Storage Usage limit.)"
* Members who have connected Box will no longer be able to:
- Delete from Teams Members
- Delete the account
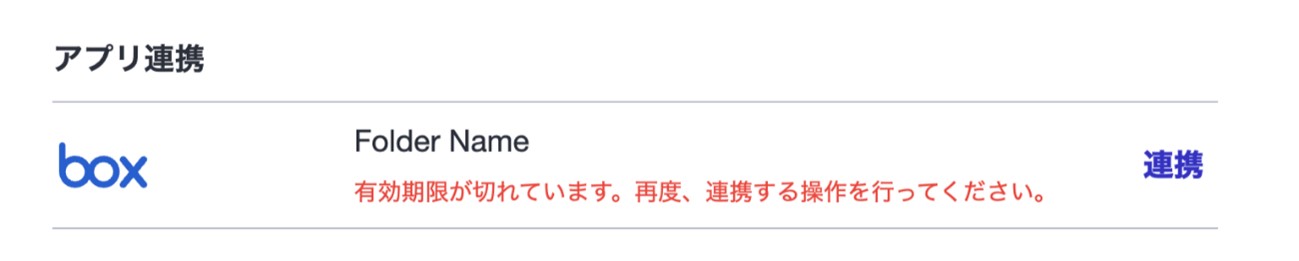
* The authentication for the Connect expires 60 days after the last upload date and hr. If there are no uploads for over 60 days, you will need to perform the Connect operation again.
Invite Members
- Go to app2.ricoh360.com/login on your PC browser and log in
- Click on the username in the upper right corner and click on the Admin Console in the drop-down list that appears
- (For users who are administrators on multiple teams) Click on the team name displayed in the menu on the left side of the screen and select the team name from the drop-down list.
- Click Member in the menu on the left side of the screen
- Click on Invite button
The dialog box "Invite Members" will open. - Click on the drop-down list in the upper right corner of the dialog box and select the role of the member to be invited
- Enter the email address(es) of the member(s) you wish to invite in the Email address field, and click Invite.
An invitation e-mail will be sent to the e-mail address you entered.
Member List
Invitees will appear in the list of Members.
The list of Members can be sorted by Name, Role in Ascending order ↑/ Descending order ↓
Move the pointer over the "Name" or "Role" and a rollover will appear showing "Sort by Name" or "Sort by Role". In this state, left-click the mouse to sort the list.
*Sorted by Role, the order is as follows.
- Ascending order ↑ : Admin (Owner) → Admin → Member → Pending
- Descending order ↓ : Pending → Member → Admin → Admin (Owner)
The sort information of the sorted Member List is retained when the list is redisplayed after moving to another page.
Changing the role of a member
Member roles can be changed at any time.
1. On the member list screen, click […] to the right of the member whose role you want to change to open the menu, and then click [Change Role].
2. In the displayed “Change Role” drop-down list, select the role you want to assign.
3. Click [Save].
Member roles and privileges
The roles and privileges of members are as follows.
Admin (Owner)
The person who first creates a team automatically becomes the administrator (owner) of the team.
There must be one Admin (Owner) in the team. If you want to change your role from “Admin (Owner),” please change another member to “Admin (Owner).”
The administrator (owner) can access all the functions.
- Accessing the “Admin Console”
- Viewing the team dashboard
- Viewing the management screen for THETA cameras belonging to the team
- Viewing the team member list
- Changing the member roles (The “Admin (Owner)” role can be assigned to another member as needed.)
- Deleting members
- Opening “Team Settings” to change or view the following items
- Changing the team name
- Changing the team icon
- Viewing the contract plan
- Uploading images to the team cloud
- Viewing, downloading, and deleting images uploaded to the team cloud
Admin
The administrator can access all the functions except for deleting the team and assigning the “Admin (Owner)” role.
- Accessing the “Admin Console”
- Viewing the team dashboard
- Viewing the management screen for THETA cameras belonging to the team
- Viewing the team member list
- Changing the member roles (The “Admin (Owner)” role cannot be assigned to other members.)
- Deleting members
- Opening “Team Settings” to change or view the following items
- Changing the team name
- Changing the team icon
- Viewing the contract plan
- Uploading images to the team cloud
- Viewing, downloading, and deleting images uploaded to the team cloud
Member
The member can access all images, but cannot access the “Admin Console”.
- Uploading images to the team cloud
- Viewing, downloading, and deleting images uploaded to the team cloud
Album
* This feature is available only to customers who have subscribed to the RICOH360 Business Package or the RICOH360 Business Package Type S.
The album is a function for organizing multiple photos and videos together.
Creating an album
- Access the login page (app2.ricoh360.com/login) on your PC’s web browser and then log in.
- Click [Album] on the side menu.
- Click [Create album] in the upper right corner of the screen.
- Enter the album name and then click [Create].
- Click [Add] and then select the photos and videos you want to add to the album.
- Click [Add to album].
Note
- Album names can be duplicated.
- The maximum number of albums you can create is 1000.
- You can add up to 10000 photos and videos to a single album.
- Album names are limited to 100 characters or less.
- While viewing an album, you can also add photos and videos by clicking [Add].
- While viewing an album, you can change the album name by clicking [more] in the upper right corner of the screen.
Deleting the album
When the album list is displayed in card view:
- Place the cursor in the upper right corner of the album you want to delete and then click [︙].
- Click [Delete album].
- Click [Delete album] to confirmthe deletion.
When the album list is displayed in list view:
- Click the checkbox to the left of the name of the album you want to delete (multiple selections are possible).
- Click [Delete album] in the upper right corner of the screen.
- Click [Delete album] to confirm the deletion.
Note
- The album is deleted, but the photos and videos in the album are not deleted.
Display photos and videos added to an album in a side-by-side comparison
Just as in the photo and video list, you can display two 360-degree images from an album side-by-side within a single viewer.
For instructions on how to use the side-by-side comparison view, please refer to this page this page.
Deleting photos and videos added to the album
- While viewing a photo or video added to the album, click [more] in the upper right corner of the screen.
- Click [Delete album].
- Click [Delete album] to confirmthe deletion.
Changing the display format and sorting order
The display format and sorting order of the album list can be changed using the buttons in the upper right corner of the screen.
- Display format: Card view, Listview
- Sorting order: Created, Lastupdated, Album name (ascending/descending)
Sorting order for photos and videos in thealbum:
- Date taken, Date added to album(ascending/descending)
Other operations
When the album list is displayed:
- In list view: Click [...].
- In card view: Click [︙] in the upper right corner of the album.
The following operations are available:
- [Rename album]: You can editthe album name.
- [Pin to sidebar]: You can pin the album to the album list in the sidebar.
Click [>] to the right of “Album” to display the pinned albumsbelow.

- Clicking ☆ changes its color to yellow, adding the album to your favorites.
