Viewing Live Video on a Computer
You can display video live on a computer by switching to the live streaming mode.
Necessary preparations
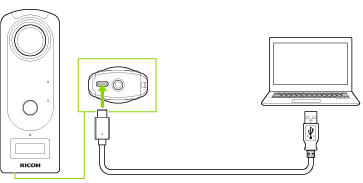
1. Connect the camera to the computer using the provided USB cable.

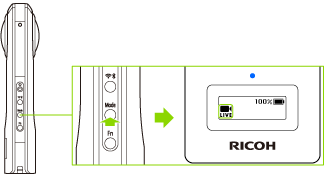
2. Press the mode button to select the live streaming mode.


appears on the OLED panel.
3. Start an app that can play back live camera images. (“Media Player Classic - Home Cinema” (MPC-HC) is used as an example in the following descriptions.)
4. Select [View] → [Options] in the “MPC-HC” menu.
5. Select [Capture] in [Playback] on the [Options] screen, and then select [THETA Z1] in [Video].
6. Select [External Filters] on the [Options] screen, and then click [Add Filter].
The [Select Filter] dialog box is displayed.
7. Select [Enhanced Video Renderer] (EVR), and then click [OK].
The display returns to the [Options] screen.
8. Select [Prefer] on the right side of the screen, and then click [OK].
The display returns to the playback screen.
9. Select [File] → [Open Device] in the “MPC-HC” menu.
The live video is displayed on the computer.
The shutter button is not used because the video is continually output.
Caution
- Howling may occur if the computer speakers are used. If howling occurs, turn the computer speakers off.
- The following operations are not available with the basic app for smartphone in the live streaming mode.
- Shooting still images and videos
- Viewing images in the camera
- Transferring images from the camera
- Deleting images from the camera
Note
- When the camera is connected using a USB cable, you can display live images while powering the camera. However, if the supplied power is low, a battery drain occurs, and the camera power may turn off.
- Connect the camera to a charging downstream port (USB port compliant with USB BC standard) to supply power effectively.
Supplementary Information
