Settings for Network in CL mode
The RICOH360 App has a function to automatically Upload Images saved in the THETA's memory to the Cloud. Up to 5 Networks can be registered.
Registering RICOH THETA has been discovered. If multiple networks are registered, when the Camera is set to CL mode, it will access them in order from the network displayed at the top (highest connection priority) and connect to the corresponding network if it is discovered.
If you Add Your Pictures to a new Network when 5 Networks are registered, the Network with the lowest Connection priority (displayed Settings at the bottom of the screen) will be Deleted.
Please check the following points in advance.
- Turn on Bluetooth on your smartphone.
- Allow Bluetoothe Settings app.
- Turn on Location App Information Service
- Allow App Information to be used for location
Registering a network
1. Tap the THETA icon at the bottom of the screen.
2. Select the THETA you want to connect to the cloud from the list of registered cameras.
3. Tap Wireless LAN Connection Settings in Connection Settings.
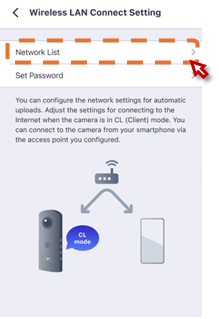
4. Tap Network List.
5. Tap Add Network or tap + at the top right of the screen.
6. Enter a network name.
7. Tap [No] under [Security] and select the wireless encryption standard for the network you want to connect to from None / WEP / WPA2/PSK.
8. Enter the password
Steps 6-8 can also be completed by scanning a QR code. Tap [Scan QR Code], start the camera, and scan the QR code.
9. Tap [Save]
Procedure for sorting access priority
Registered Networks can be set to access priority from the top of the Network List Settings. After adding a Network, you can reorder the access priority.
The sorting procedure is as follows
1. Tap Wireless LAN Connection settings Connection settings to open the Network List screen.
2. Tap the 4-line icon in the upper right corner of the screen.
The right side of each Network Name will change to a 4-line icon.

3. Tap and slide the 4-line icon to rearrange the order
4. Tap Save
Edit Registered Networks
Please change your SSID, Password, etc. for the Network you have registered, and please change your Password, etc. Please change your Password, etc. Please edit each item according to the following procedure.
1. Tap Wireless LAN Connection settings Connection settings to open the Network List screen.
2. Tap the Network Name you wish to Edit
3. Edit the Network Name, Wireless Encryption Standard and Password for the Network you are connecting to.
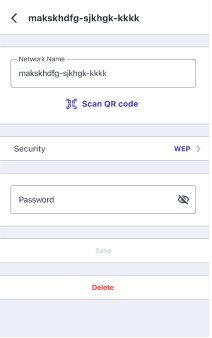
4. Tap Save
Delete a Registered Network
1. Tap Wireless LAN Connection settings Connection settings to open the Network List screen.
2. Tap the Network Name you wish to Delete
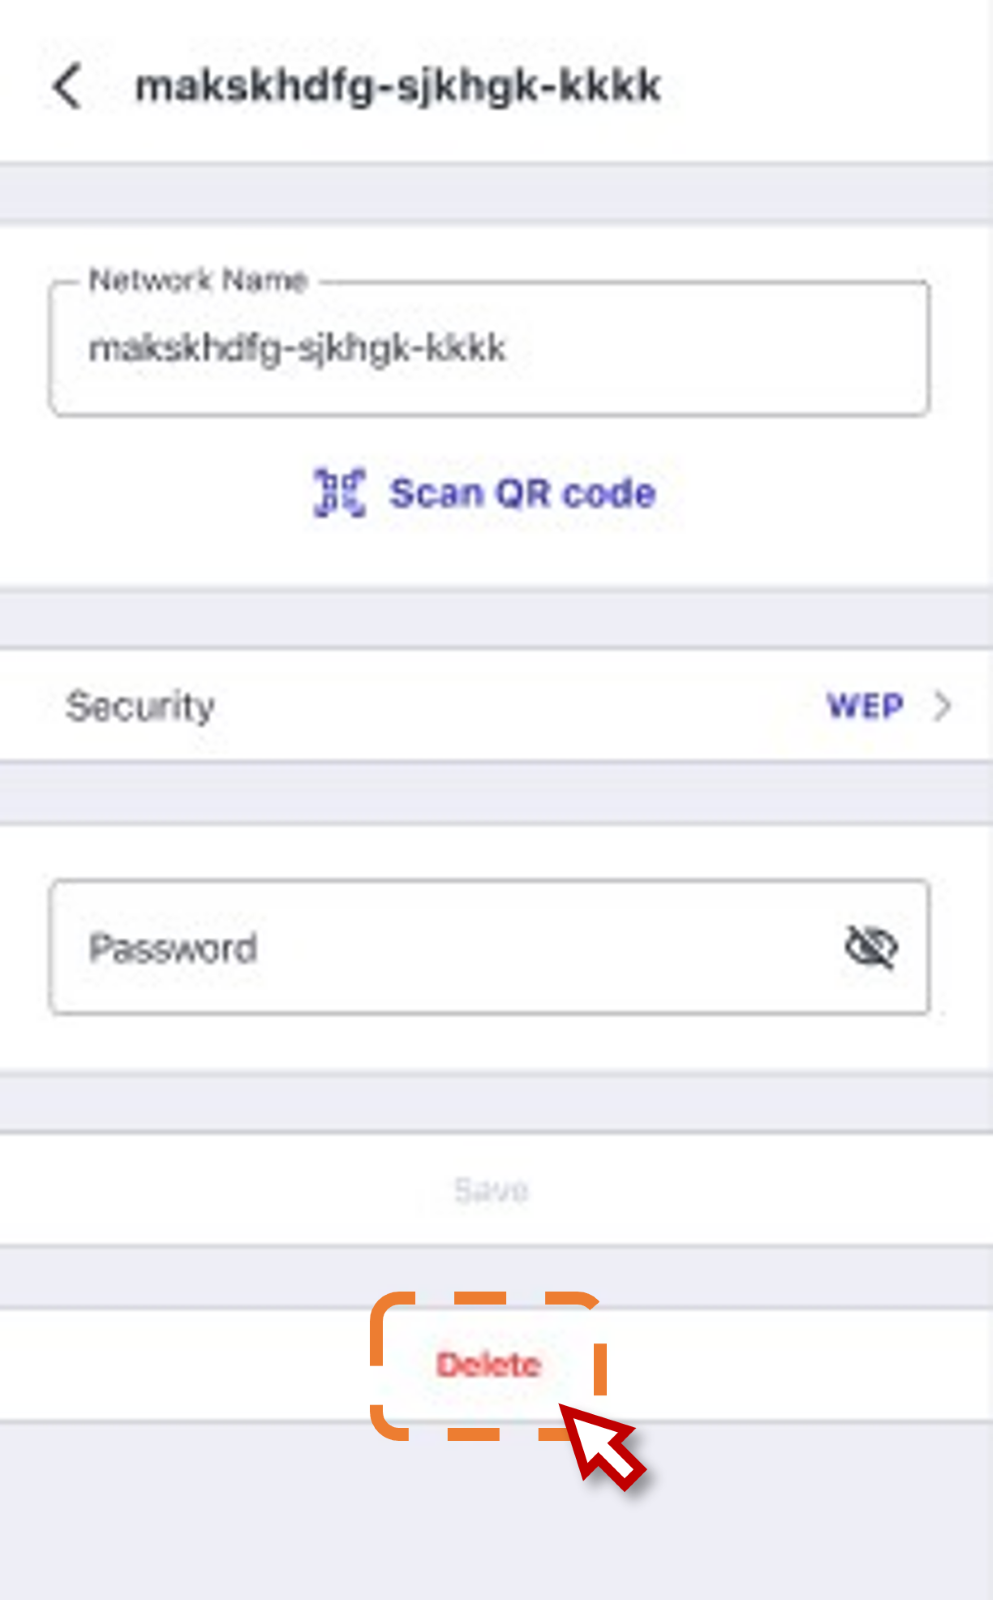
3. Tap Delete