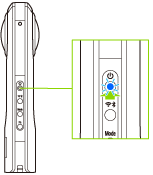
Connecting the Camera to the Remote Control TR-1
You can use the Bluetooth® function to connect the camera to the Remote Control TR-1 (sold separately). Set the camera in advance so that the plug-in “REMOTE CONTROL” can be run.
Changing the Plug-ins Available on the Camera
1. Turn on the power of the camera.

2. Press and hold the mode button.

The plug-in selection screen is displayed on the OLED panel.
3. Press the mode button to select “REMOTE CONTROL”.


flashes on the OLED panel.
4. Press and hold the shutter button on the Remote Control TR-1 to set it to the pairing state or connection standby state.
When the camera is connected to the Remote Control TR-1,

becomes lit on the OLED panel.
Note
After running the plug-in “REMOTE CONTROL”, the response speed of the wireless LAN slows down until the connection between the camera and the Remote Control TR-1 is established.
Disconnecting the Remote Control TR-1 from the Camera
1. Press and hold the mode button.
When multiple plug-ins are installed in the camera, select “REMOTE CONTROL”, and then press and hold the mode button.


turns off on the OLED panel, and the Remote Control TR-1 is disconnected from the camera
Resetting the Connection Information
When you want to connect another device to the camera or when the Remote Control TR-1 cannot be connected correctly, press and hold the wireless button and mode button simultaneously to reset the connection information.
Caution
If you reset the connection information, the wireless LAN password is also reset.
